Home / Use a Fan-Assisted Cone TLUD to Make High-Quality Biochar
Use a Fan-Assisted Cone TLUD to Make High-Quality Biochar
How to Use a Solar Fan‑Assisted Cone TLUD to Make High‑Quality Biochar
This guide explains how to operate the solar fan‑assisted cone TLUD to produce high‑quality biochar from coffee husk. It is designed to match the construction guide and focuses on clean combustion, consistent carbonization, and practical field operation using locally available materials.
Solar fan‑assisted cone TLUD (built as per the construction guide)
Coffee husk (preferably dry)
Moist or partially quenched biochar (starter char)
Small sticks (kindling)
Small amount of flammable liquid
Matches or lighter
Smooth stick or rod (for making air channels)
Water (for checking burn depth and quenching)
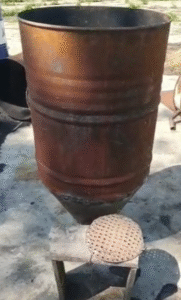
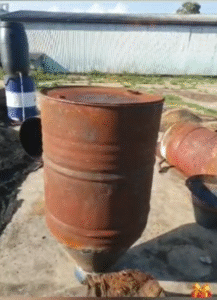
Step 1: Position the TLUD
Place the TLUD on a level, stable surface so it stands upright.
A stable setup ensures even airflow through the cone and prevents uneven burning or collapse of the fuel bed.
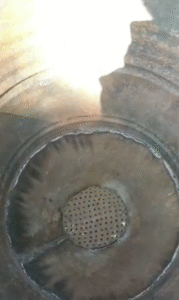
Step 2: Insert the Inner Sheet Metal
Insert the small sheet metal piece inside the TLUD, as shown in the reference video.
This internal piece helps guide airflow and protects the cone during operation.
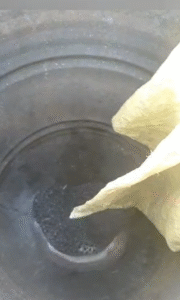
Step 3: Add Starter Biochar
Add 4–5 liters of moist biochar to the bottom of the TLUD.
This starter layer protects the cone tip from overheating, stabilizes airflow, and improves char quality at the base.
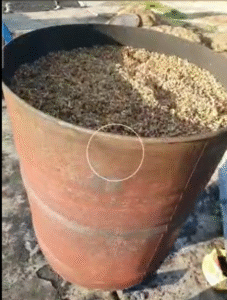
Step 4: Fill with Coffee Husk
Fill the TLUD fully with coffee husk.
Do not compact the husk too tightly; loose packing allows better airflow and more uniform carbonization.
Step 5: Create Vertical Air Channels
Using a smooth stick, make 6–7 vertical holes through the husk, from top to near the bottom.
These channels allow air to move easily upward through the fuel, reducing smoke and improving burn consistency.
Step 6: Add Kindling and Ignition Fuel
Place a few small sticks on top of the husk. Add a small amount of flammable liquid to the sticks.
This helps establish a strong, even top‑lit flame.
These channels allow air to move easily upward through the fuel, reducing smoke and improving burn consistency.
Step 7: Ignite the TLUD
Ignite the sticks using matches or a lighter.
Once ignited, the flame should spread evenly across the top surface.
This helps establish a strong, even top‑lit flame.
These channels allow air to move easily upward through the fuel, reducing smoke and improving burn consistency.
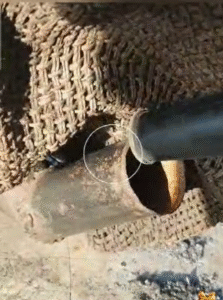
Step 8: Turn on the Fan and Cover
Turn on the fan at full power and cover the TLUD.
Keep the fan running at maximum speed for about 10 minutes after ignition to establish a strong and clean combustion front.
Step 9: Adjust Airflow for Clean Burn
After the first 10 minutes, adjust airflow using the fan control or bypass method shown in the video.
Target conditions:
No visible smoke
A steady flame
Medium flame speed (not racing, not dying)
Too little air causes smoke and incomplete carbonization. Too much air reduces char yield.
Step 10: Monitor Burn Progress
To check how far the burn has progressed, pour a small amount of water on the outside wall of the TLUD.
When the hot zone reaches the bottom of the cone, the burn is complete.
At this point:
Turn off the fan
Prepare to quench the biochar
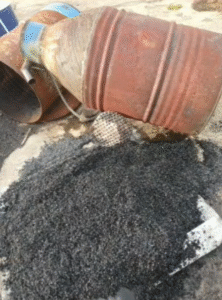
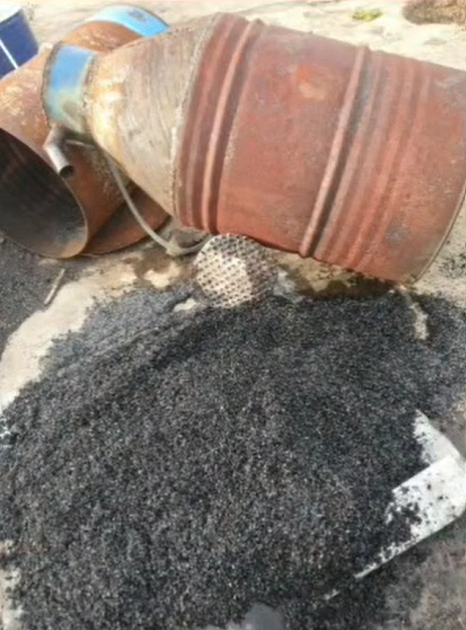
Step 11: Quench and Cool
Quench the biochar using water or by sealing the unit to exclude air.
Allow the char to cool completely before removal to avoid oxidation and loss of carbon.
This operating method was developed through field use with coffee wet mills and farmer‑scale systems. When combined with the cone‑based TLUD design, it produces:
Higher biochar yield
More complete carbonization at the base
Lower smoke emissions
Consistent results across variable husk quality
This makes it suitable for farmer training, cooperative use, and decentralized biochar production aligned with WasteFree23’s circular waste solutions.