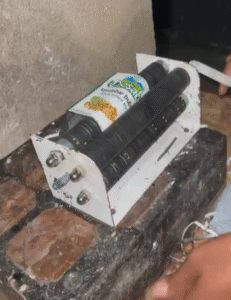
Step-by-Step Guide: Building and Using the Manual Hand-Crank Plastic Slicer
Welcome to the Waste Free ’23 DIY Workshop! In this guide, we show you how to build, assemble, and use a manual hand-crank plastic slicer that turns everyday plastic waste into uniform strips.. making it easier to process, melt, weave, or feed into recycling and upcycling systems.
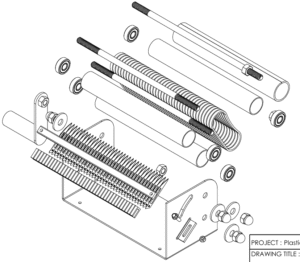
This slicer is simple, robust, open-source, and designed so a local welder or mechanic can build it with basic tools. Click here to view the complete mechanical drawing and BOM.
STEP 1: Understand the Slicer and Prepare Your Workspace
The manual slicer works like a hand-cranked cutting roller. It consists of:
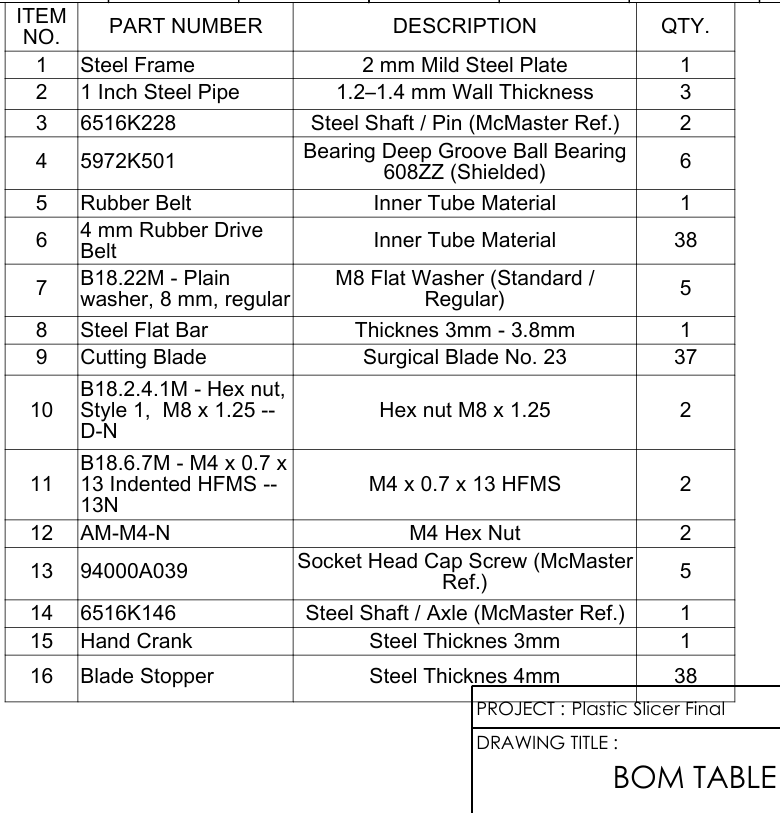
A steel frame (2 mm mild steel plate)
Two roller assemblies made from 1-inch steel pipe
608ZZ ball bearings for smooth rotation
A hand crank for manual operation
A rubber drive belt system for traction
A cutting blade array made from surgical blades (No. 23)
Blade stoppers to control cutting depth and spacing
Before you begin:
Place the slicer on a stable table or workbench.
Ensure the frame is securely bolted down or clamped.
Keep your hands clear of the blade zone.
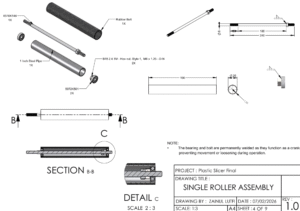
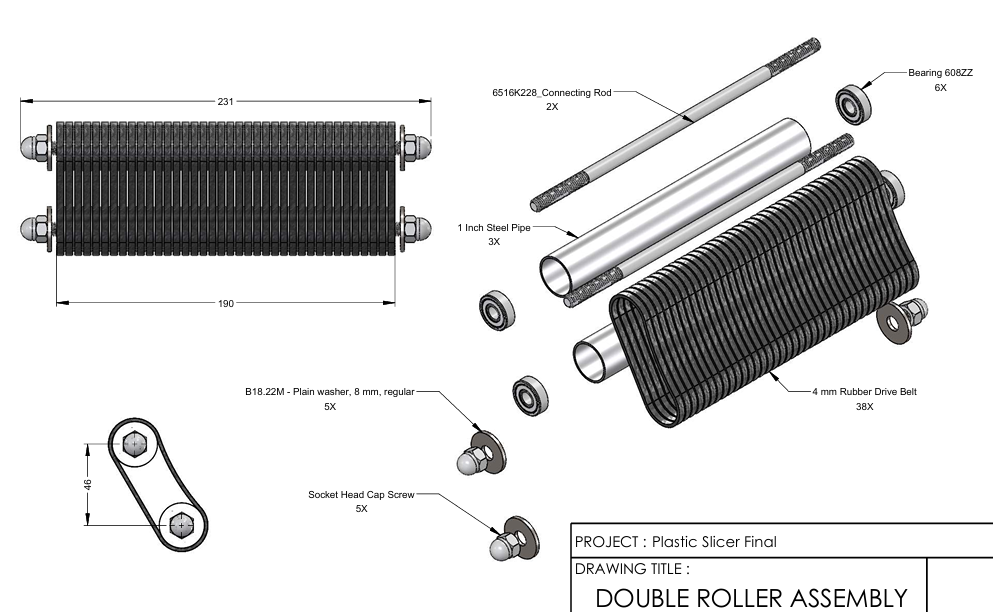
STEP 2: Assemble the Roller System
Using the mechanical drawings in the PDF:
Build the single roller assembly:
Insert the steel shaft (6516K146) through the 1-inch steel pipe.
Mount 608ZZ bearings on both ends.
Attach the rubber belt and weld the bearing/bolt in place as a fixed crank support (as per drawing note).
Build the double roller assembly:
Connect two steel shafts (6516K228) as connecting rods.
Mount three 1-inch steel pipes as rollers.
Install six 608ZZ bearings.
Add the 4 mm rubber drive belts for grip.
These two rollers work together to pull plastic through the blades smoothly.
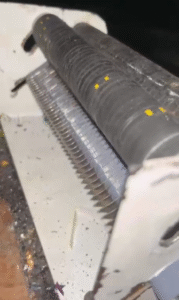
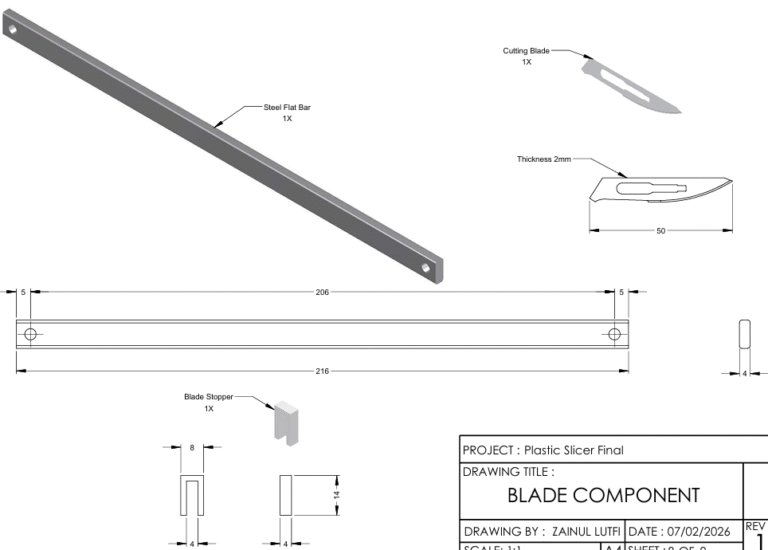
STEP 3: Install the Cutting Blade System
On the steel flat bar:
Mount 37 surgical blades (No. 23) in a straight line.
Place 38 steel blade stoppers between blades to maintain equal spacing.
Secure everything using M4 screws and hex nuts.
This creates a precise, repeatable strip width across the full 190–200 mm cutting span.
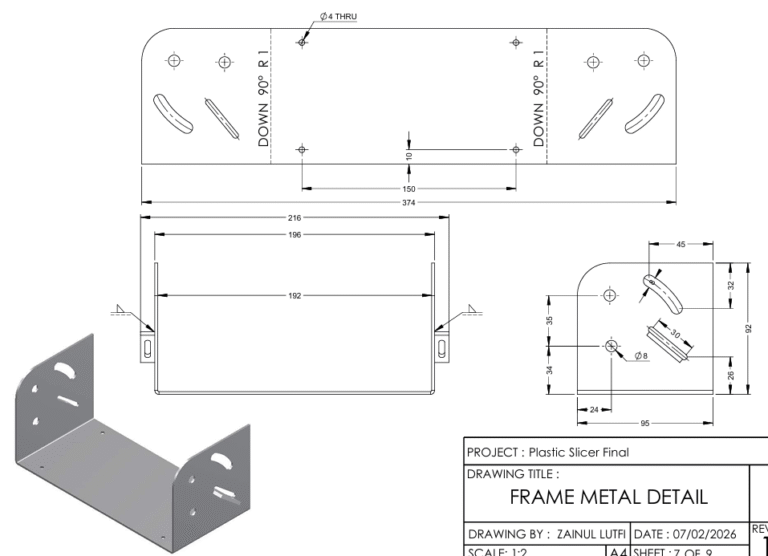
STEP 4: Mount Everything onto the Frame
Attach to the 2 mm steel frame:
The single roller assembly (crank side)
The double roller assembly (cutting side)
The blade bar assembly in front of the rollers
The hand crank on the designated shaft
Check that: Rollers spin freely, blades are aligned, rubber belts sit properly and provide traction
STEP 5: Prepare Your Plastic Waste
The slicer works best with:
HDPE, LDPE, and PP (polythene bags, packaging)
Clean, dry plastic
Flattened sheets or layered pieces
Avoid (or expect poor results with): very thick rigid plastics, PVC, plastic heavily bonded to aluminum foil, wet or greasy materials
STEP 6: Slice the Plastic
Insert plastic into the front of the slicer, just above the blade line.
Turn the hand crank steadily.
The rollers will pull the plastic through the blades.
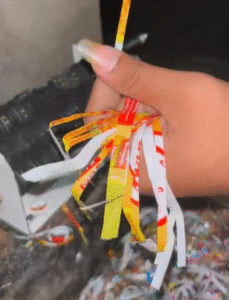
Collect uniform plastic strips at the exit.
You can:
Feed single sheets
Stack multiple layers for faster processing
Experiment with different thicknesses
STEP 7: What It Can and Cannot Slice (Real-World Testing)
Based on initial demonstrations and field feedback:
✅ Works well with:
PE (HDPE / LDPE)
PP containers and sheets
Soft packaging films (many grocery bags)
Mixed household plastic waste (cleaned)
⚠️ May struggle with:
Very thick rigid plastic
Strongly laminated materials (plastic + aluminum)
Plastic with embedded paper layers
Irregular, heavily crumpled waste
Waste Free ’23 encourages communities to document both successes and failures to improve future designs.